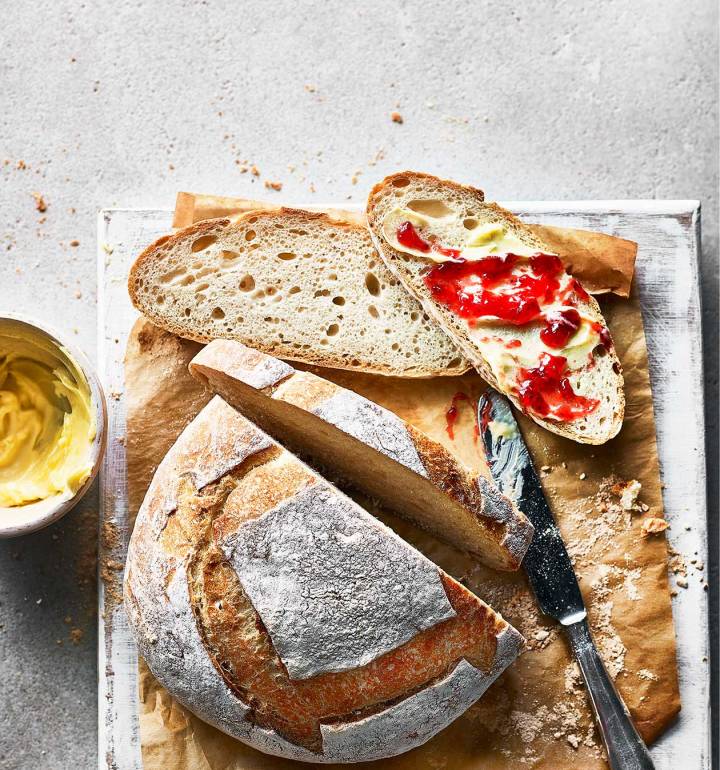
Starter-free sourdough
Makes: 12-14 slices

Recipe photograph by Martin Poole
Starter-free sourdough
Recipe by Sarah Cook
This gorgeous loaf still requires patience, but instead of a challenging ‘starter’ it uses kefir. Both contain similar bacteria and yeasts for leavening and flavour development – it’s just that one requires a week’s prep before you can start to bake, the other you simply pick up in the chiller aisle
Makes: 12-14 slices
See more recipes
Nutritional information (Per slice)
Calories
163Kcal
Fat
1gr
Saturates
0gr
Carbs
33gr
Sugars
1gr
Fibre
2gr
Protein
5gr
Salt
0.6gr

Sarah Cook
Sarah, a former food editor, has now been writing and styling recipes for over 10 years. Born in NZ, to Irish-English immigrants, and married to a Polish-Scot, her food is as diverse as her family, with a particular passion for baking mash-ups.

Sarah Cook
Sarah, a former food editor, has now been writing and styling recipes for over 10 years. Born in NZ, to Irish-English immigrants, and married to a Polish-Scot, her food is as diverse as her family, with a particular passion for baking mash-ups.
Ingredients
- 500g strong white bread flour, plus extra to dust
- 1 tsp fast action dried yeast
- 1 ½ tsp fine sea salt
- 200ml plain kefir
Step by step
Get ahead
Keeps for up to 2 days ,or can be frozen (well-wrapped). A defrosted whole loaf should be crisped up for 10 minutes in an oven preheated to 160°C, fan 140°C, gas 3.
- Start this the day before you want to eat your bread, beginning in the morning. Weigh 100g of the flour into a medium-sized bowl and stir in the yeast. Add 150ml of lukewarm water. Mix to a batter, then cover and leave for 5 hours at room temperature.
- After 5 hours, weigh the remaining flour into your largest mixing bowl, or a stand mixer, and stir in the salt. Mix your kefir with 50ml water, then add this and your now bubbly batter to the flour. Mix to a smooth dough, progressing from a wooden spoon to hands. The dough will be very, very soft. Tip onto a floured surface and knead for 10 minutes until the dough is very smooth, elastic and springy. It will be fairly sticky but try to add as little extra flour as possible. If you’re using a stand mixer instead, the knead time will be halved.
- Return the dough to the cleaned bowl, cover and leave to rise overnight at room temperature.
- In the morning, scrape out the bubbly batter-like dough onto a floured work surface. Leave to settle and spread for a few minutes, then gently stretch and fold the dough over itself, from each of the 4 sides. Repeat this a few times to help strengthen the dough’s structure; it will start to hold its shape. If it is really too sticky to handle you can incorporate a little more flour as you go, but only if it’s absolutely necessary; this dough is meant to be quite slack and stretchy, not like a normal bread dough. When it will hold a rough ball shape, flip onto a sheet of floured baking paper so that the ‘folds’ are underneath, and finish shaping into a neat ball. Leave to rise, uncovered, for 45-60 minutes – don’t worry if it spreads out a bit.
- Meanwhile, place a deep, lidded casserole dish into the oven and heat to 240°C, fan 220°C, gas 9 (the casserole acts like a miniature steam oven, trapping moisture from the bread and giving a better rise).
-
When the casserole is really hot, carefully lift in the loaf on its paper. Score a pattern in the top, cover with the hot lid and bake for 30 minutes. Remove the lid (use oven gloves) and bake for 15 minutes more until the crust is dark golden. Cool on a wire rack before slicing and eating.TipThis gorgeous loaf still requires patience, but instead of a challenging ‘starter’ it uses kefir. Both contain similar bacteria and yeasts for leavening and flavour development – it’s just that one requires a week’s prep before you can start to bake, the other you simply pick up in the chiller aisle.


