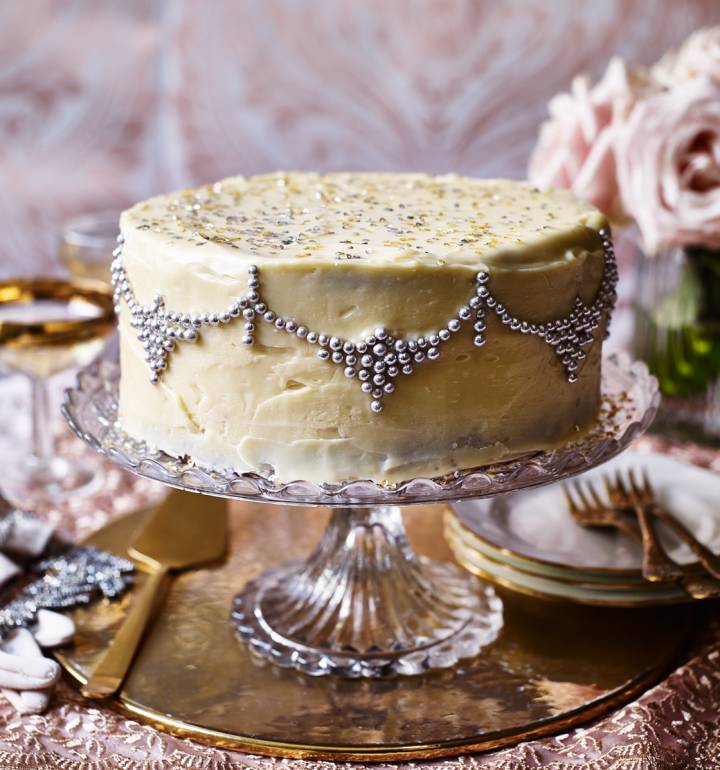
Glitzy white chocolate cake
Serves: 18-20

Recipe photograph by Toby Scott
Glitzy white chocolate cake
Serves: 18-20
See more recipes
Nutritional information (per serving)
Calories
554Kcal
Fat
28gr
Saturates
17gr
Carbs
68gr
Sugars
47gr
Fibre
1gr
Protein
7gr
Salt
0.5gr

Charlotte White
Charlotte White is the founder of cake company Restoration Cake. She specialises in vintage-inspired baking. Her latest book is Deliciously Decorated (Ryland, Peters & Small; £16.99).
See more of Charlotte White’s recipes

Charlotte White
Charlotte White is the founder of cake company Restoration Cake. She specialises in vintage-inspired baking. Her latest book is Deliciously Decorated (Ryland, Peters & Small; £16.99).
See more of Charlotte White’s recipes
Ingredients
For the cake
- 225g very soft unsalted butter, plus extra to grease
- 375g caster sugar
- 4 large eggs
- 125ml maple syrup
- 475g plain flour
- 1 tbsp baking powder
- 250ml whole milk
- 1 tsp vanilla extract
For the salted maple buttercream
- 175g soft unsalted butter
- ½ tsp fine sea salt
- 75ml maple syrup
- 175g icing sugar, sifted
For the chocolate ganache
- 300g white chocolate
- 100ml whipping cream
To decorate
- edible silver balls
- gold and silver edible sequins*, optional
Step by step
Get ahead
The sponges can be frozen for up to 1 month. The assembled cake keeps for up to 3 days in an airtight container in a cool place.
- To make the cake, preheat the oven to 180°C, fan 160°C, gas 4. Grease and line 2 x 20cm springform cake tins (or sponge tins that are at least 6cm deep). Cream the butter and the sugar for 5 minutes using a stand mixer or electric whisk until pale and creamy, scraping the mixture down occasionally.
- Add the eggs, one at a time, making sure that each one is fully incorporated before adding the next. Add the maple syrup to the mixture and beat briefly until smooth and golden.
-
Sift the flour, baking powder and ½ teaspoon of salt into another bowl and mix the milk and vanilla extract in a jug. Fold one-third of the dry ingredients into the cake mixture followed by half of the milk. Add another third of the dry ingredients, followed by the remaining milk. Remember to stir well after each addition to ensure that all ingredients are incorporated. Finish off with the final third of the dry ingredients.Tip*For edible sequins, try cake-stuff.com
- Divide the cake mixture between the cake tins and bake for 1 hour until risen and a skewer comes out clean. Cool the cakes in their tins for 5-10 minutes before turning out onto a wire rack to cool fully, removing the lining paper.
- To make the buttercream, beat the butter and salt in a stand mixer or using an electric whisk for 3 minutes until creamy. Add the maple syrup and beat again, until fully incorporated. Add the icing sugar and beat for 5 minutes until really pale and well-whipped – you are aiming for the thickness of thick whipped cream.
- To make the ganache, grate the chocolate into a heatproof bowl and set aside. Heat the cream to just short of boiling point and pour over the chocolate. Wait for a minute to allow the heat to begin melting the chocolate then slowly stir until all of the chocolate is incorporated into a glossy mixture. If any lumps remain, sit the bowl over a pan of gently simmering water and heat for 1-2 minutes, stirring attentively, until melted. Allow to cool for 15-20 minutes in a cool place (but not the fridge as it will firm up too much), or until the consistency of your ganache is similar to buttercream.
- Ensure that your cakes have cooled completely before you begin assembling. Trim the cakes with a serrated knife if they have domed, to flatten them. Put one cake on a cake stand or board, securing it in place with a small dab of buttercream, and mount on an icing turntable (if you have one).
- Spread a layer of buttercream on the topside of the cake (the cut surface, if you have trimmed them). Sandwich the second cake on top, flat base upwards.
-
Use a large palette knife to spread the remaining buttercream in a thick layer all around the top and sides of the cake. Now scrape around the cake with a side scraper tool or palette knife to remove the excess and leave a thin layer (this is called a crumb coat). Chill for 1 hour to set firm before moving on.
- Spread a generous layer of cooled ganache around the sides and over the top of your cake using the palette knife or scraper. You can spread a thin layer of ganache over the cake stand or board too if you wish.
- Use a cocktail stick to mark 8 equal portions around the top edge of your cake – the easiest way to do this by eye is to mark the opposite points and then turn your cake a quarter turn to mark the opposite points again. Finish by making a mark in-between each of your marks.
- Using a cocktail stick, create a faint swag line on the side of the cake to connect each of your points. This is intended only as a guide for our edible bling so does not need to be very precise, just try to keep the dip of each swag equal at around 2.5cm. Use your silver balls to follow the swag line, then create a series of short vertical lines, hanging down from below your swag line. These pieces should happily adhere themselves to the soft ganache with a gentle push.
- Scatter gold and silver edible sequins over the top of your cake so that a few also fall onto the cake stand beneath.


